2. Notebooks
Launch Notebook Server
Click on the Notebooks tab on the left side of the Central Dashboard.
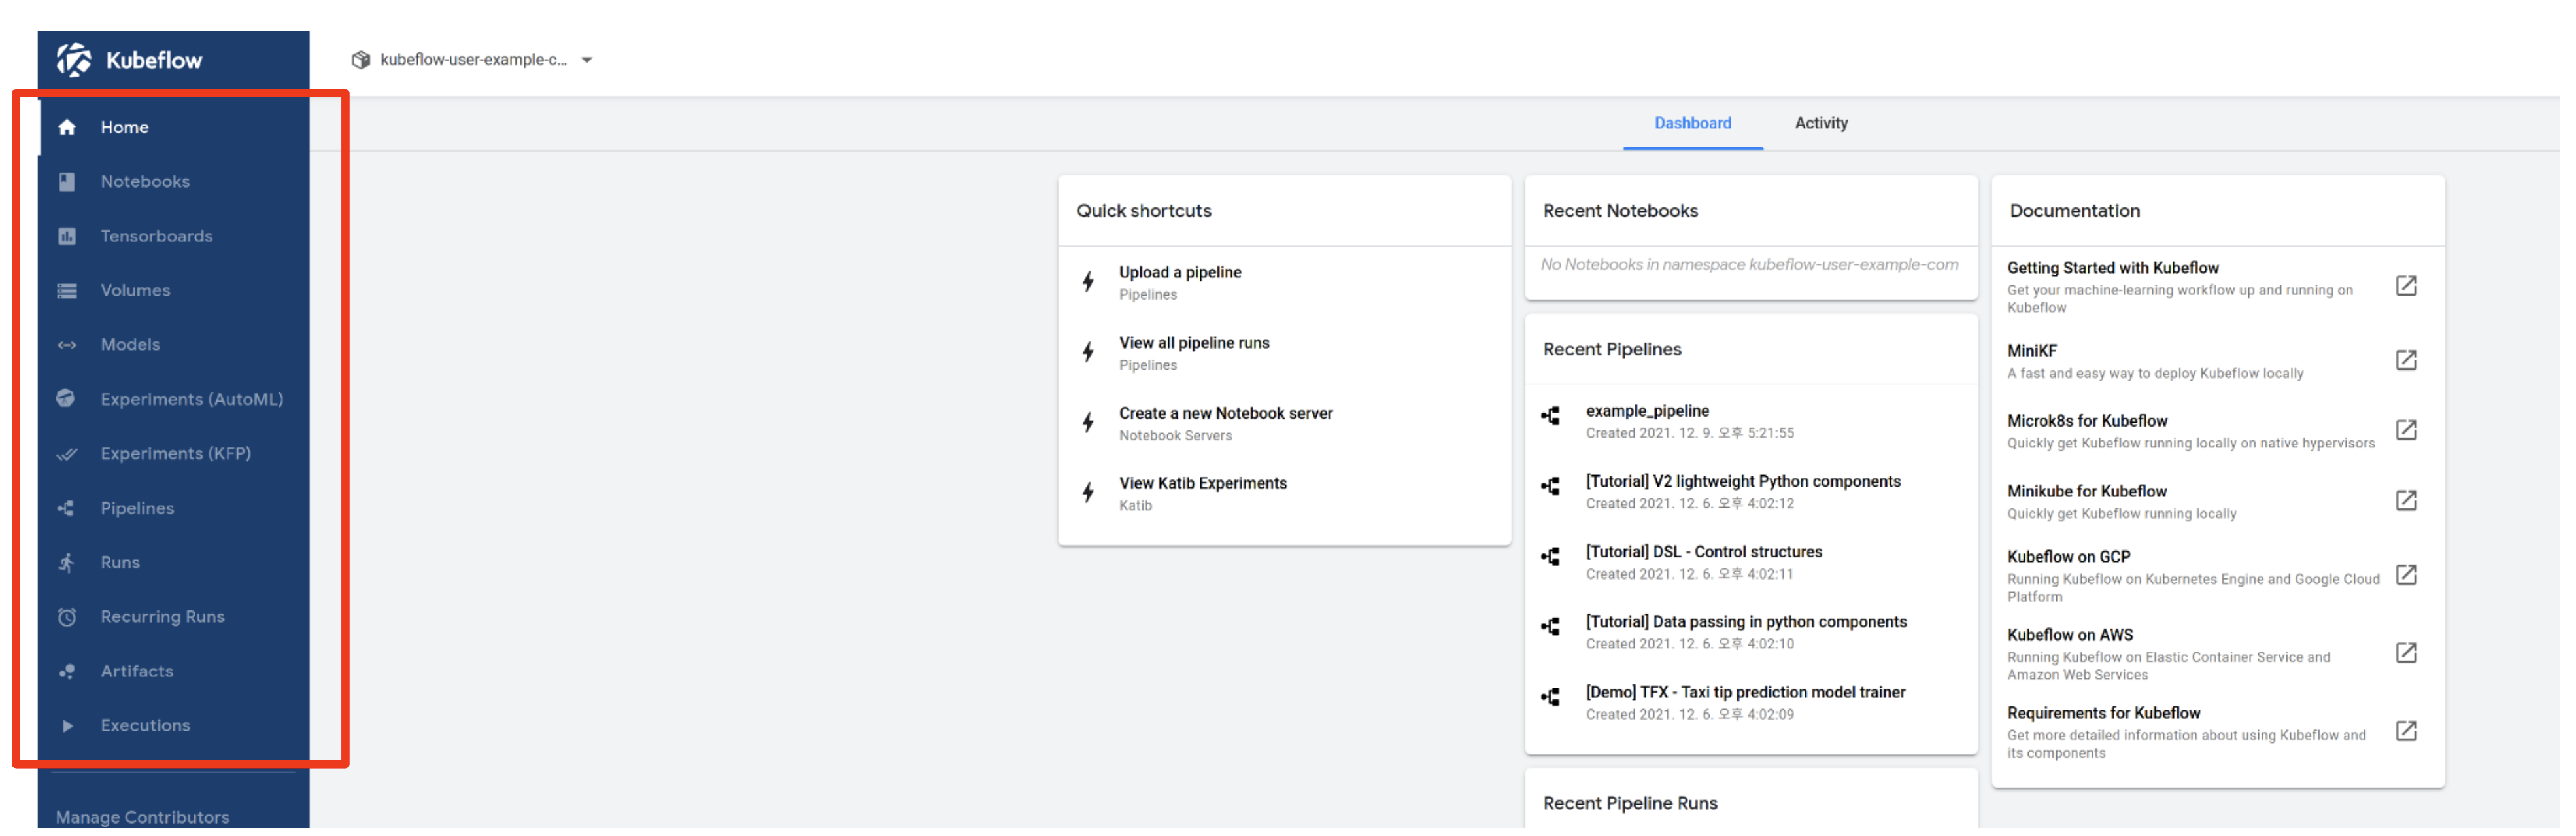
You will see a similar screen.
The Notebooks tab is a page where users can independently create and access jupyter notebook and code server environments (hereinafter referred to as a notebook server).
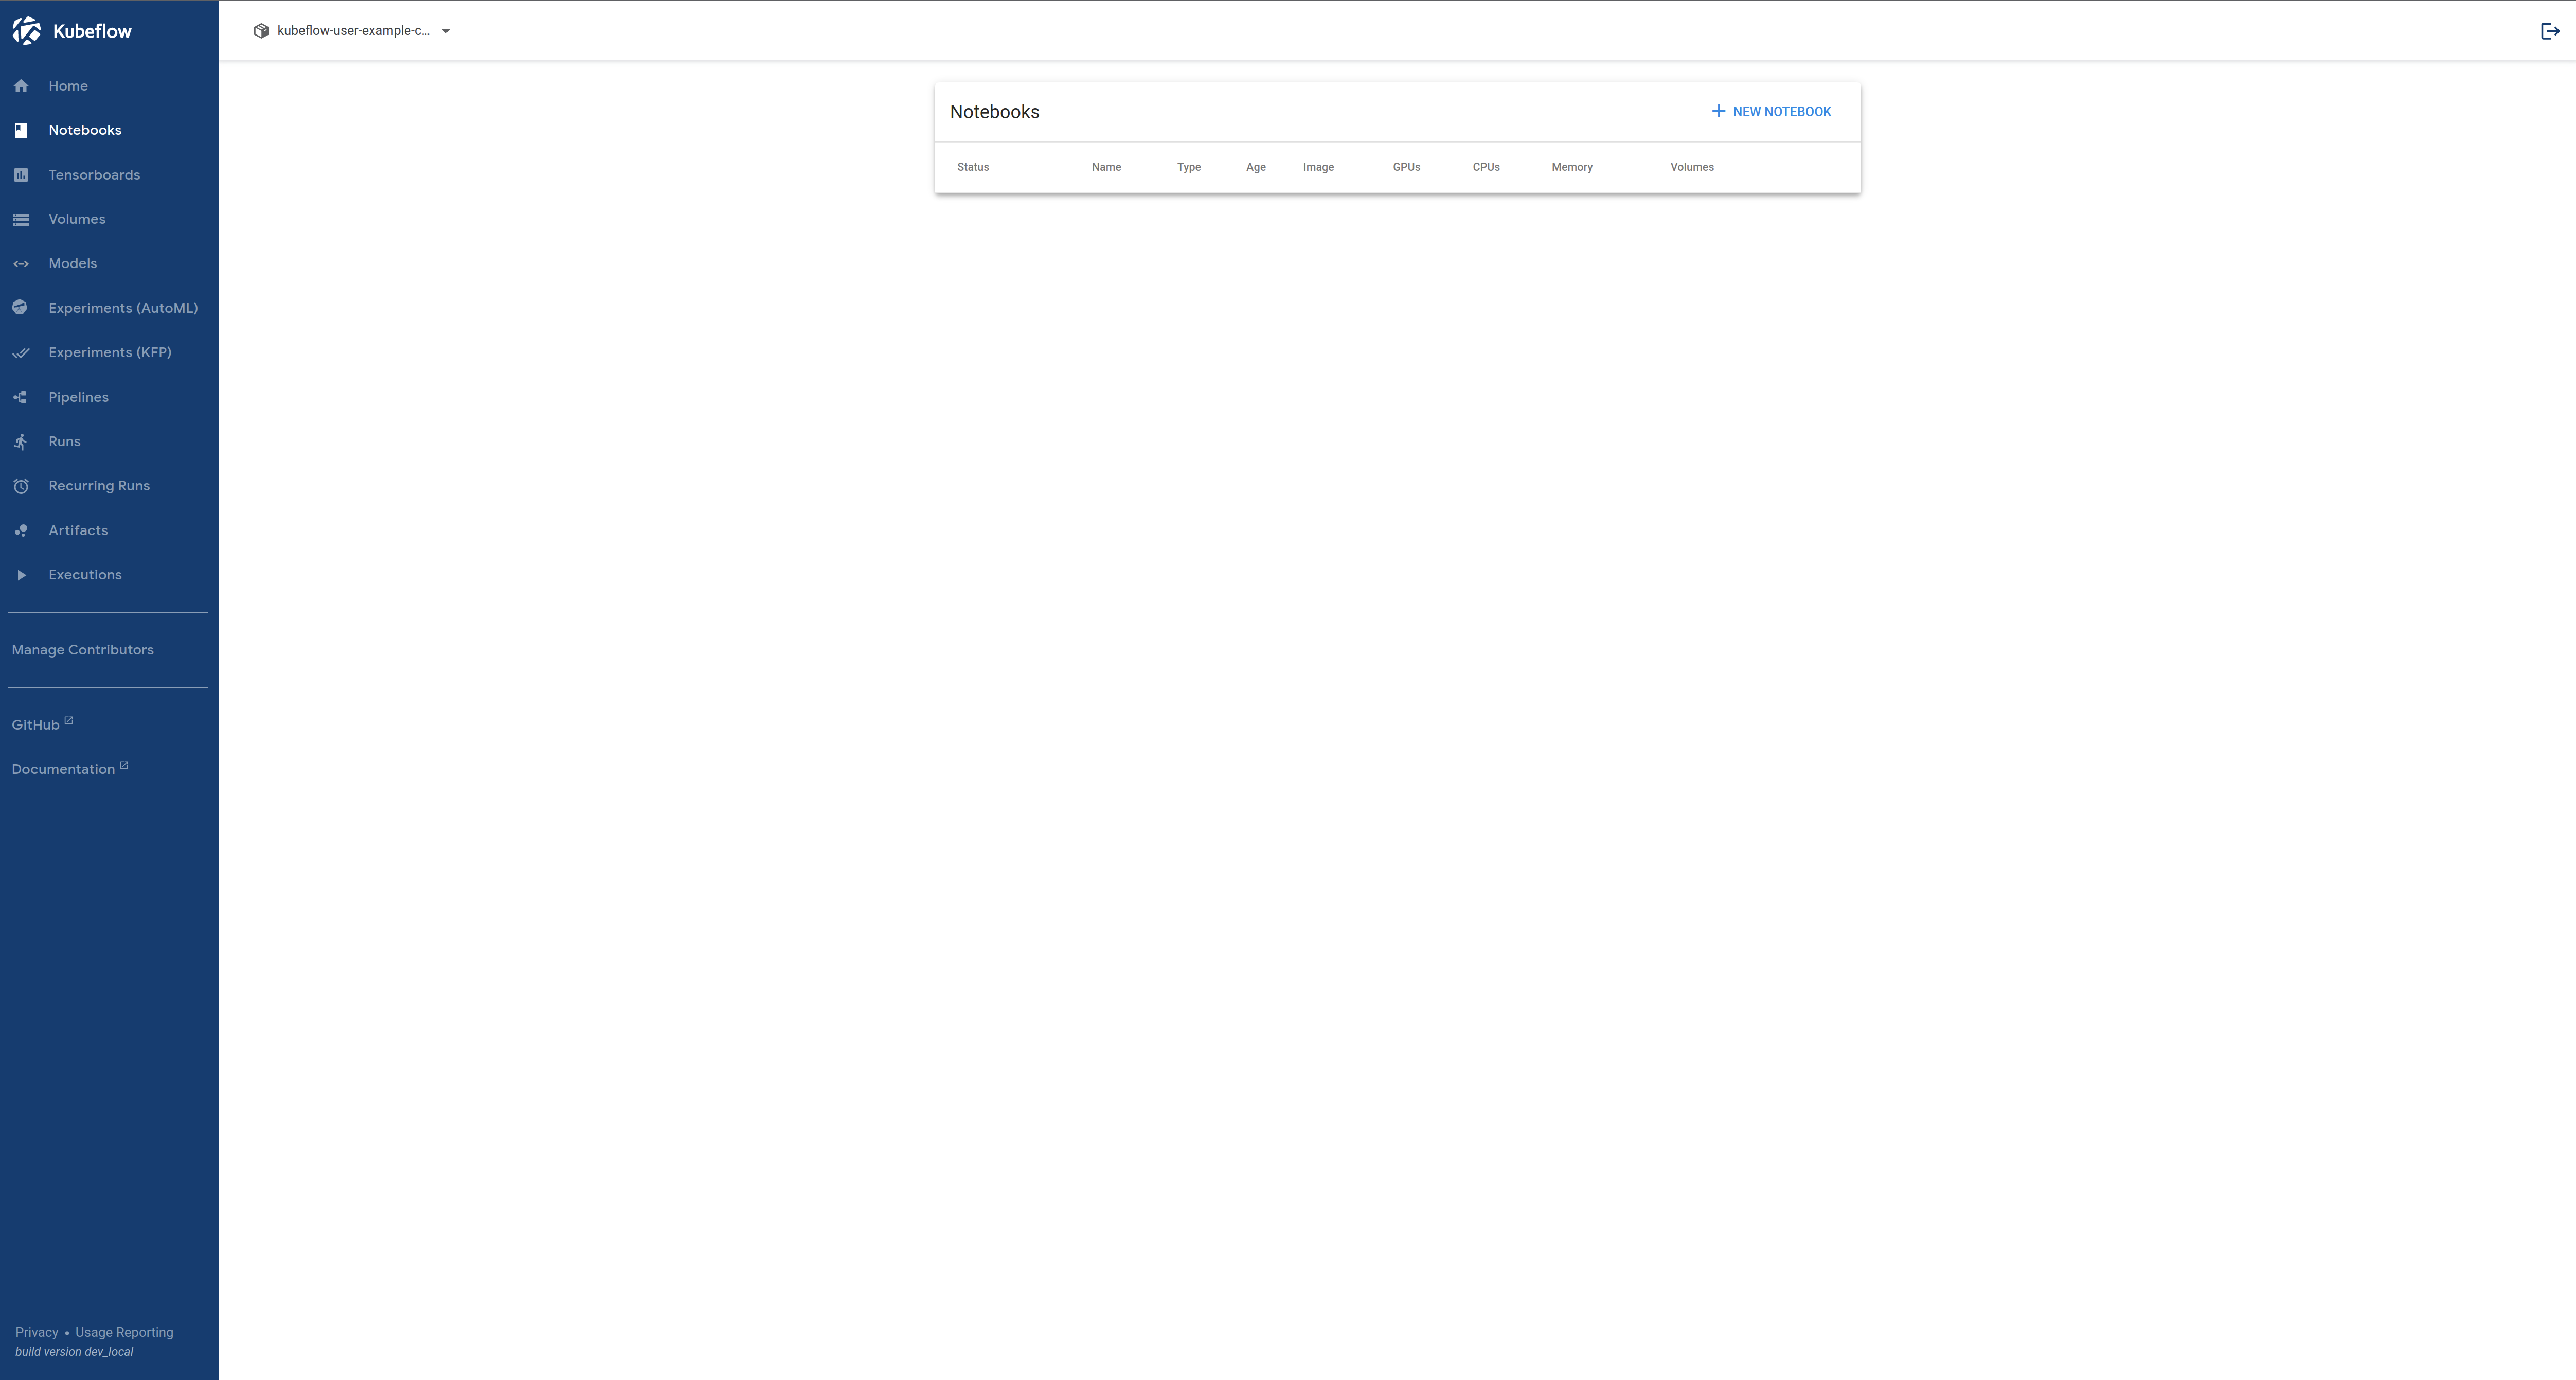
Click the "+ NEW NOTEBOOK" button at the top right.

When the screen shown below appears, now specify the spec (Spec) of the notebook server to be created.
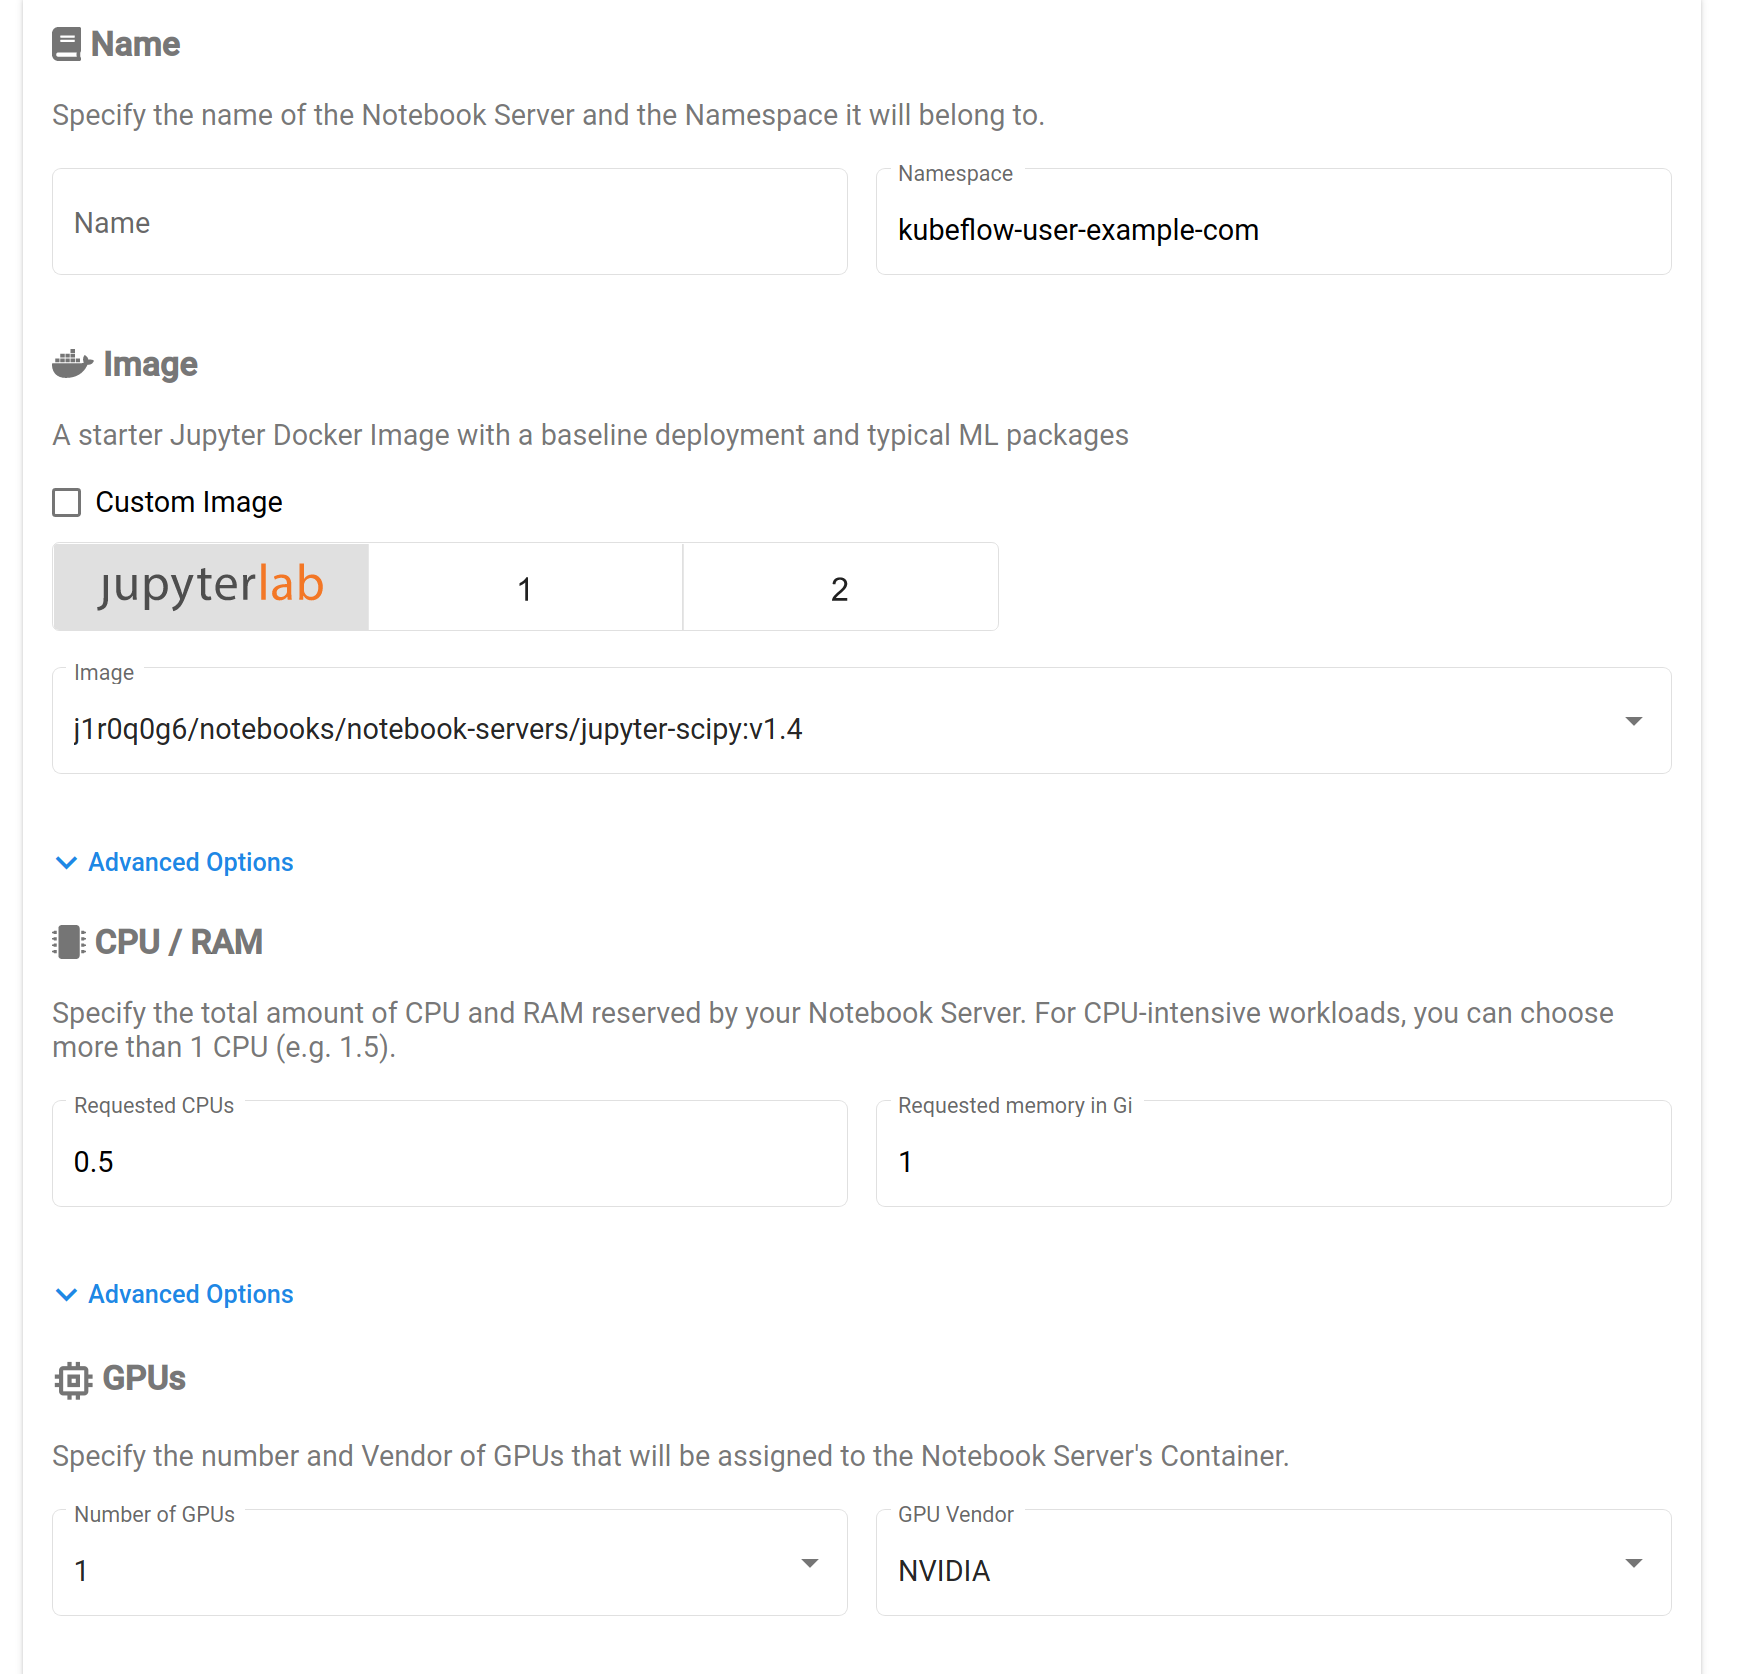
For details for spec:
- name:
- Specifies a name to identify the notebook server.
- namespace:
- Cannot be changed. (It is automatically set to the namespace of the currently logged-in user account.)
- Image:
- Selects the image to use from pre-installed JupyterLab images with Python packages like sklearn, pytorch, tensorflow, etc.
- If you want to use an image that utilizes GPU within the notebook server, refer to the GPUs section below.
- If you want to use a custom notebook server that includes additional packages or source code, you can create a custom image and deploy it for use.
- Selects the image to use from pre-installed JupyterLab images with Python packages like sklearn, pytorch, tensorflow, etc.
- CPU / RAM:
- Specifies the amount of resources required.
- cpu: in core units
- Represents the number of virtual cores, and can also be specified as a float value such as
1.5,2.7, etc.
- Represents the number of virtual cores, and can also be specified as a float value such as
- memory: in Gi units
- cpu: in core units
- Specifies the amount of resources required.
- GPUs:
- Specifies the number of GPUs to allocate to the Jupyter notebook.
None- When GPU resources are not required.
- 1, 2, 4
- Allocates 1, 2, or 4 GPUs.
- GPU Vendor:
- If you have followed the (Optional) Setup GPU guide and installed the NVIDIA GPU plugin, select NVIDIA.
- Specifies the number of GPUs to allocate to the Jupyter notebook.
- Workspace Volume:
- Specifies the amount of disk space required within the notebook server.
- Do not change the Type and Name fields unless you want to increase the disk space or change the AccessMode.
- Check the "Don't use Persistent Storage for User's home" checkbox only if it is not necessary to save the notebook server's work. It is generally recommended not to check this option.
- If you want to use a pre-existing Persistent Volume Claim (PVC), select Type as "Existing" and enter the name of the PVC to use.
- Data Volumes:
- If additional storage resources are required, click the "+ ADD VOLUME" button to create them.
Configurations, Affinity/Tolerations, Miscellaneous Settings- These are generally not needed, so detailed explanations are omitted in MLOps for All.
If you followed the Setup GPU (Optional), select NVIDIA if you have installed the nvidia gpu plugin.
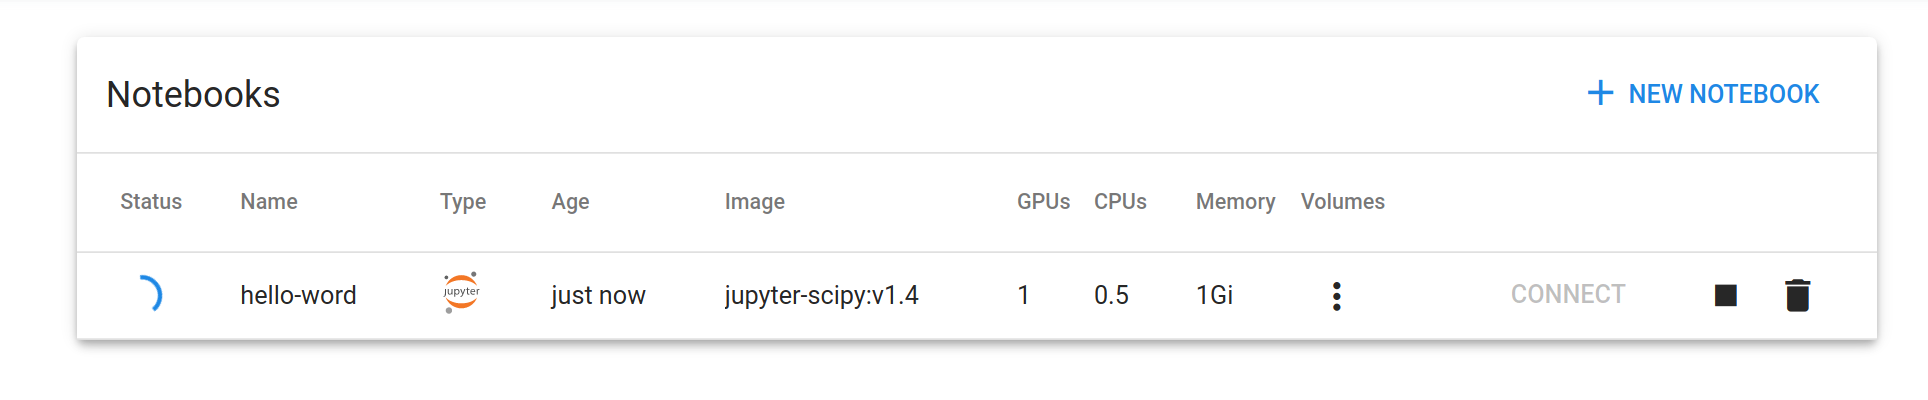
After creation, the Status will change to a green check mark icon, and the CONNECT button will be activated.

Accessing the Notebook Server
Clicking the CONNECT button will open a new browser window, where you will see the following screen:
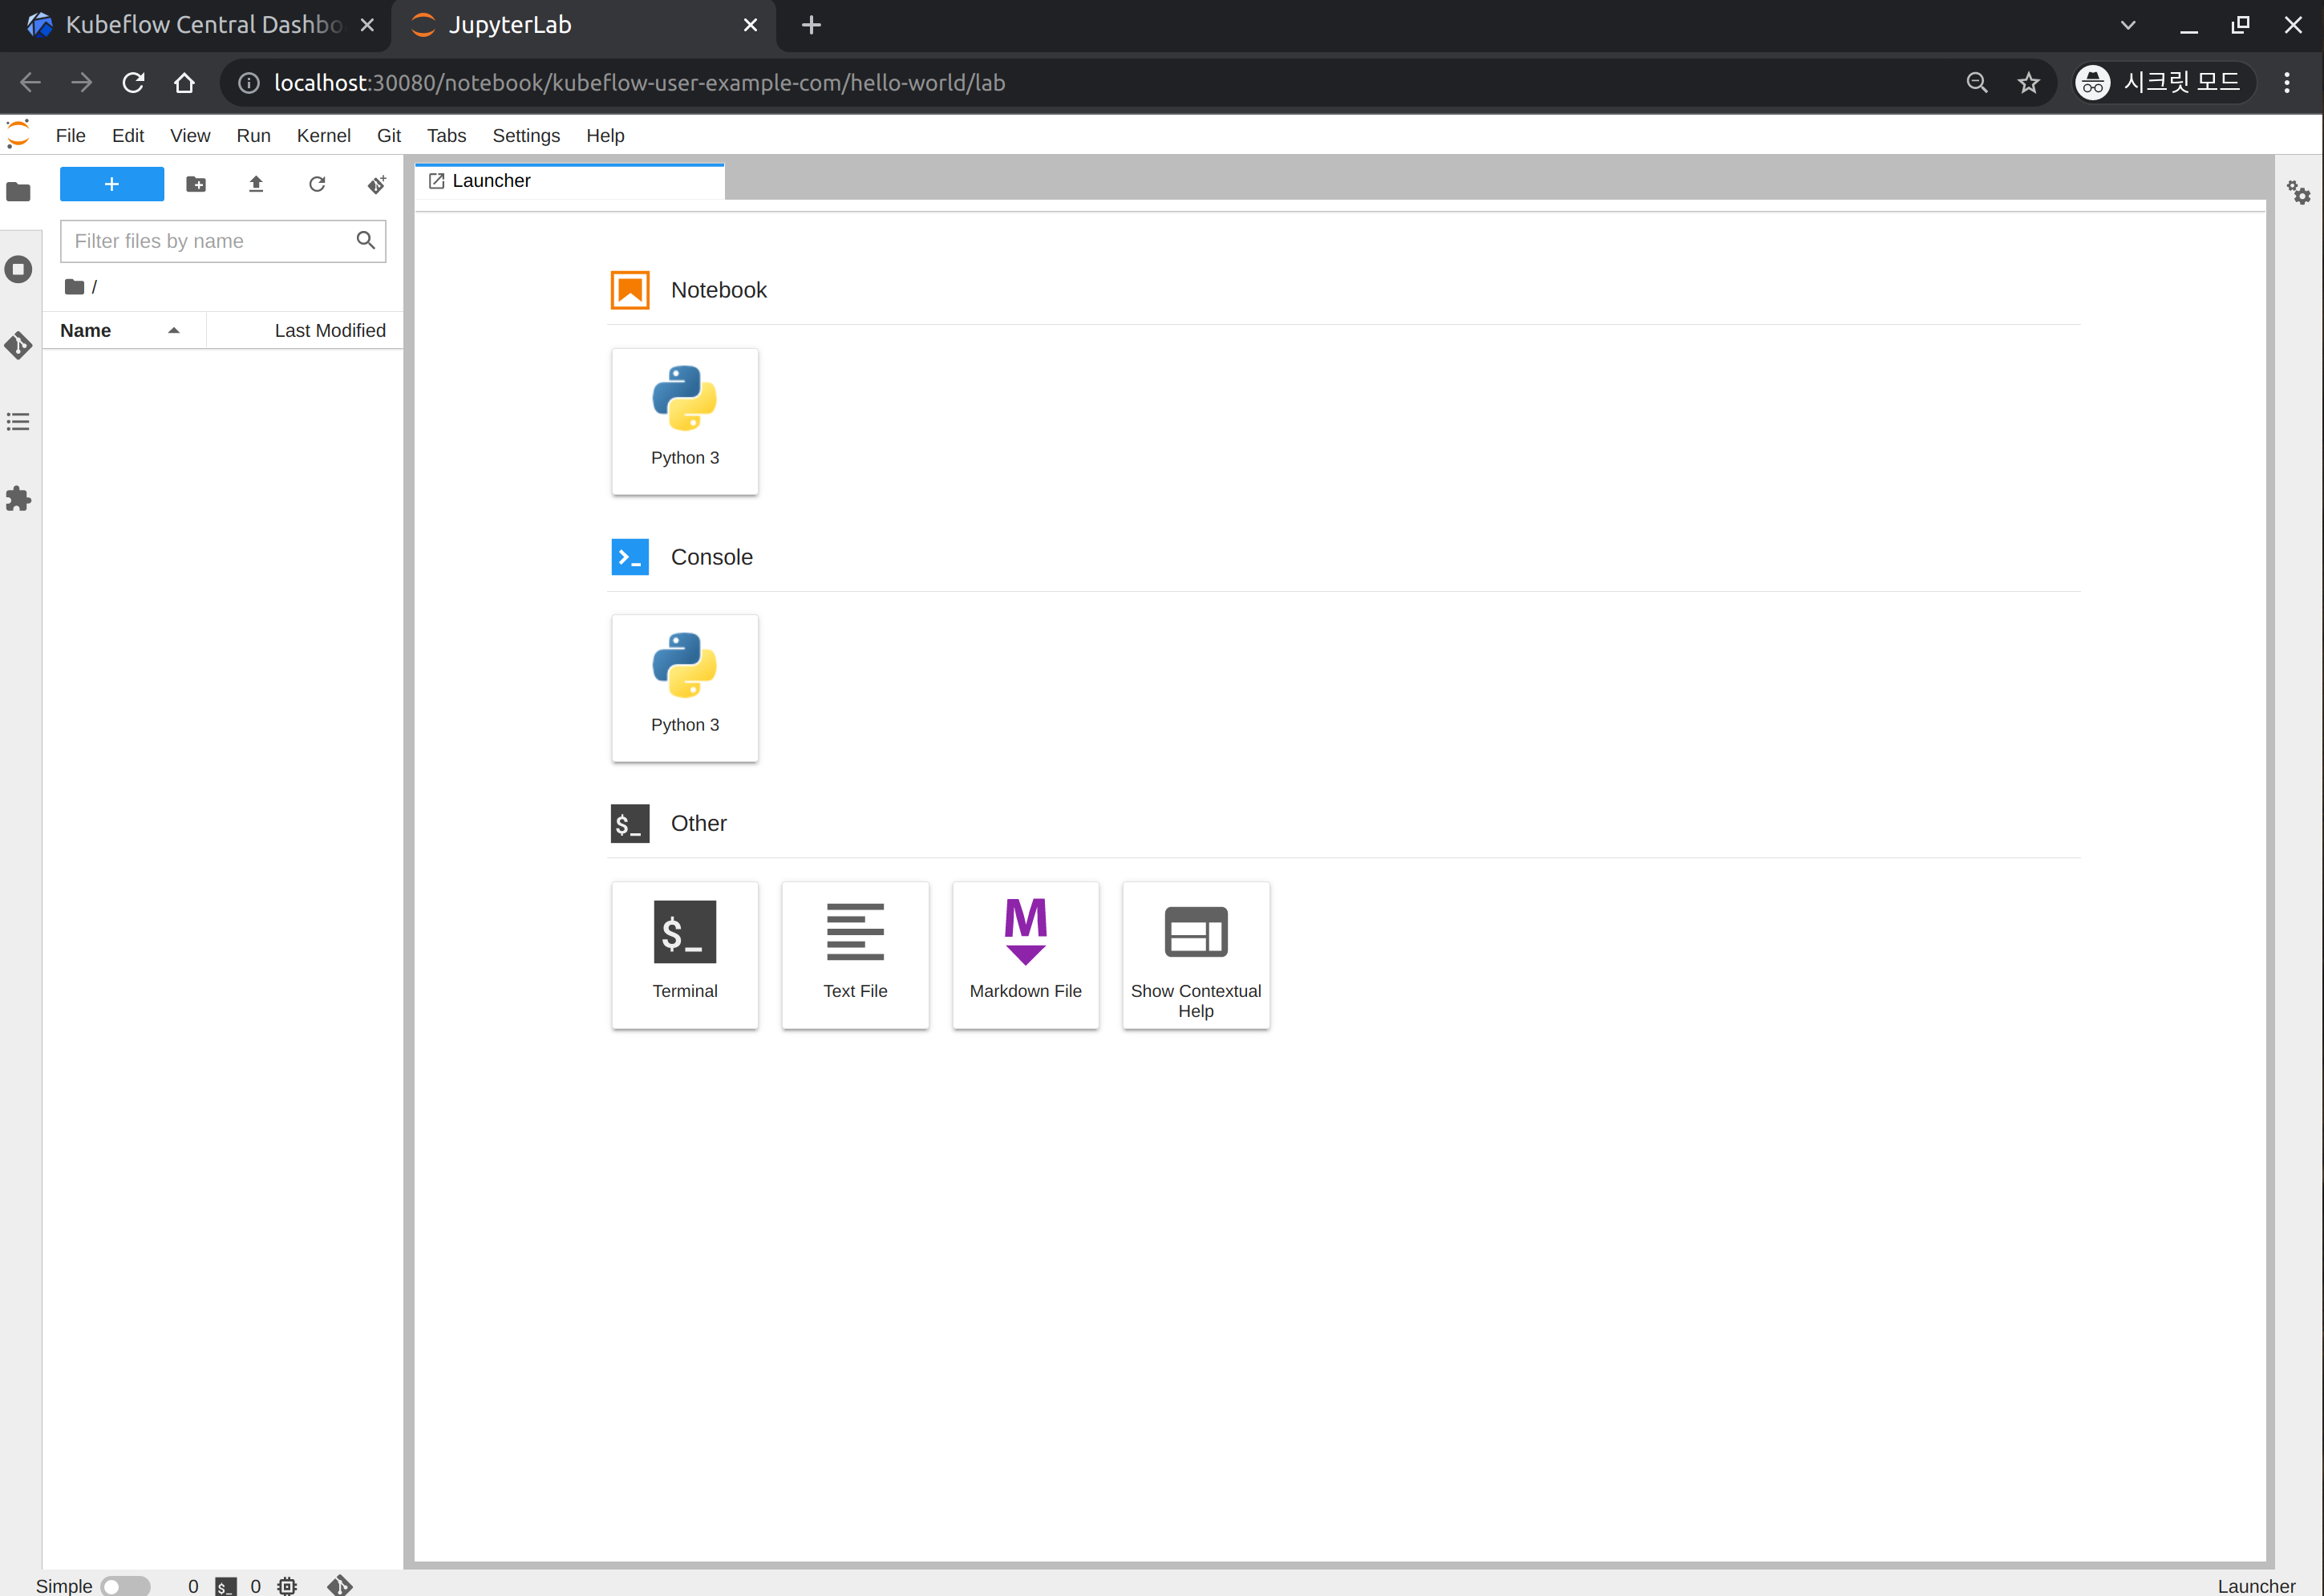
You can use the Notebook, Console, and Terminal icons in the Launcher to start using them.
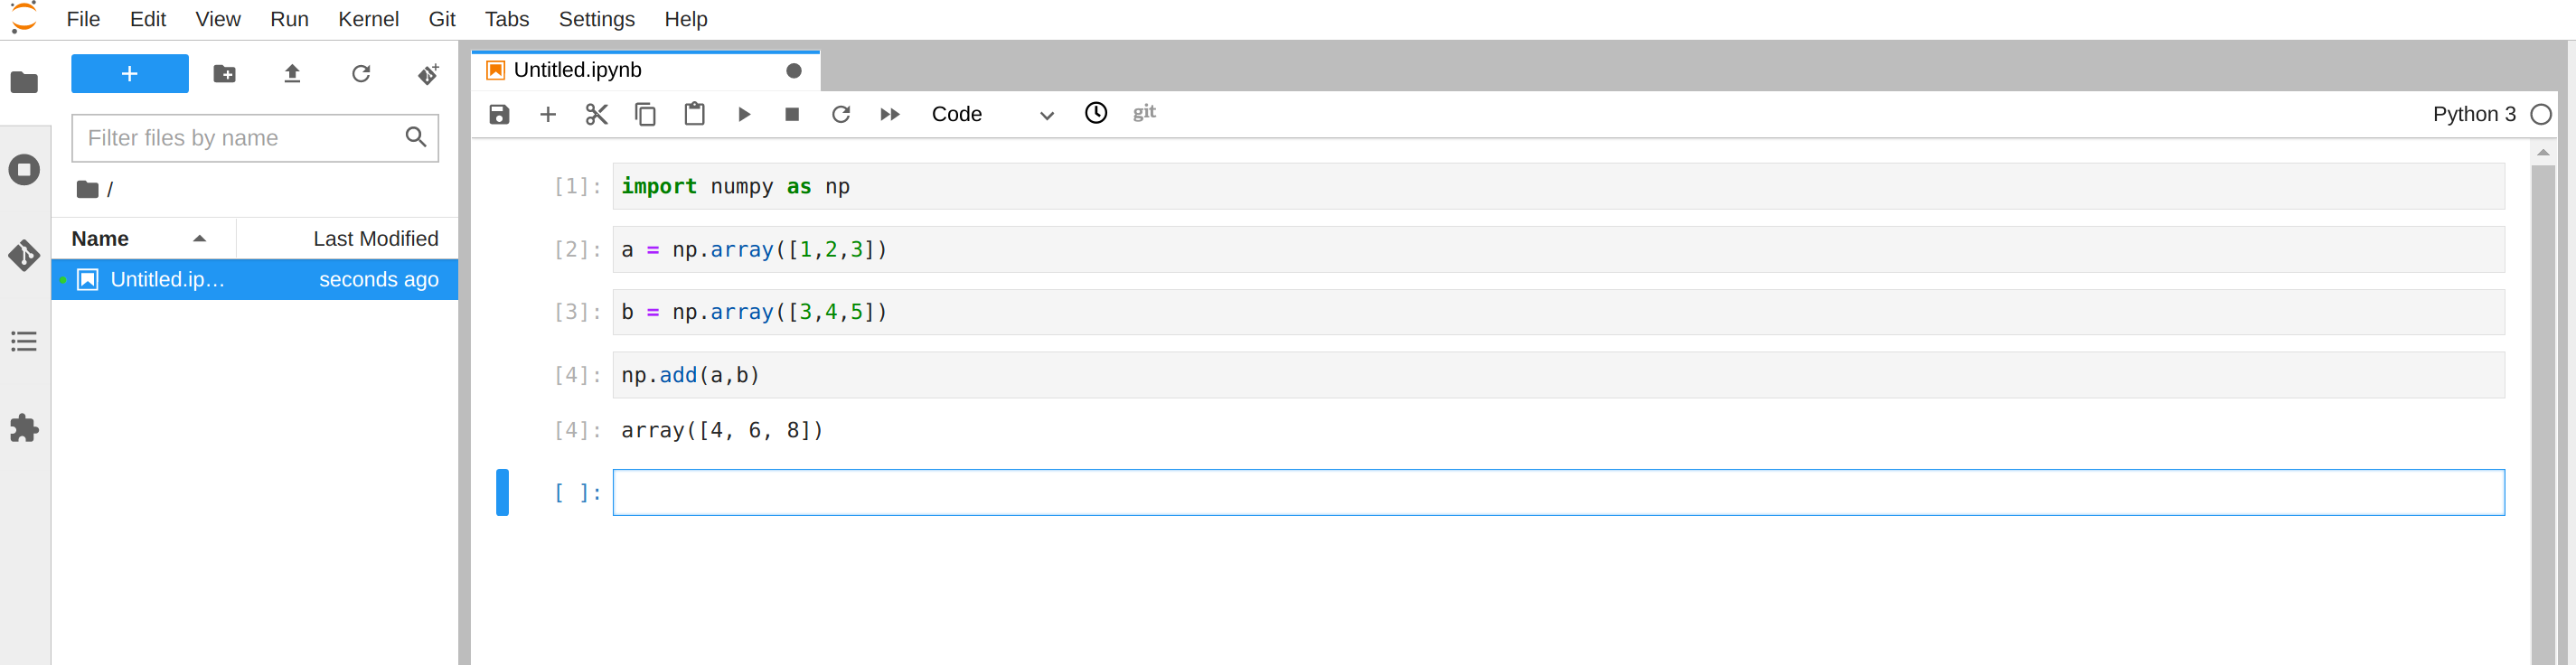
Notebook Interface
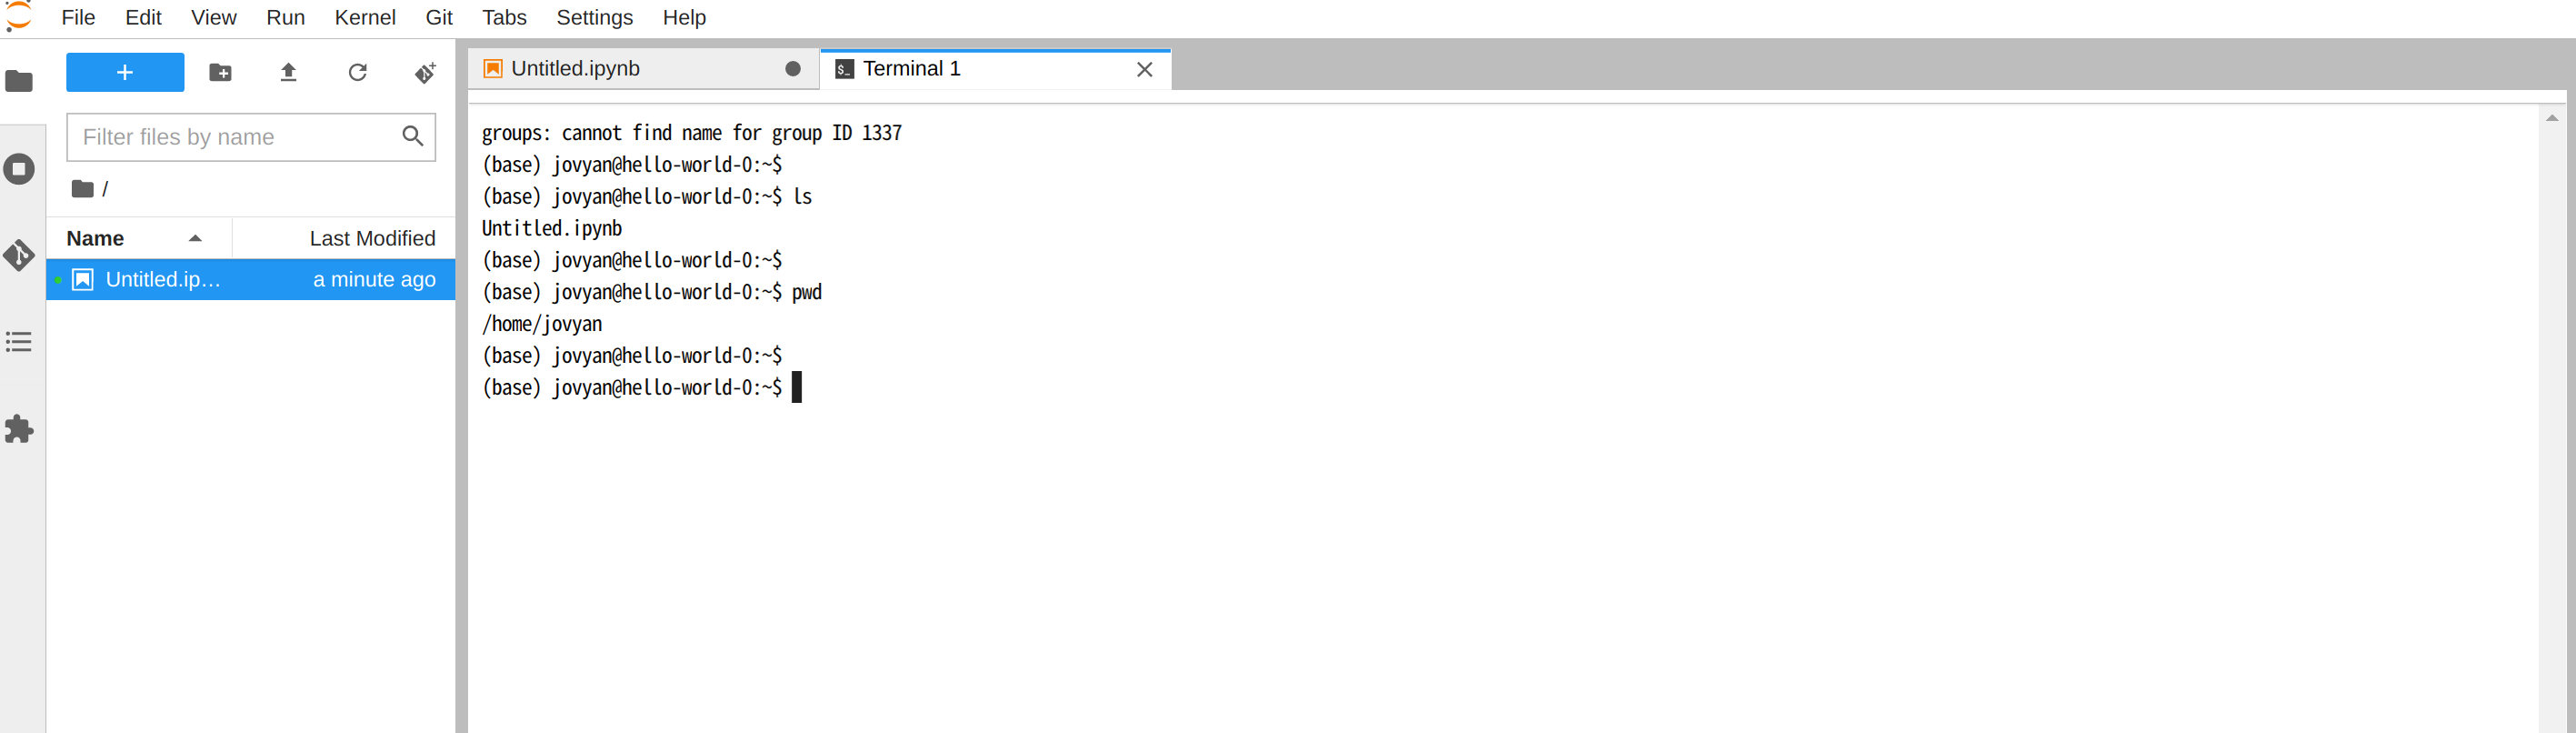
Terminal Interface
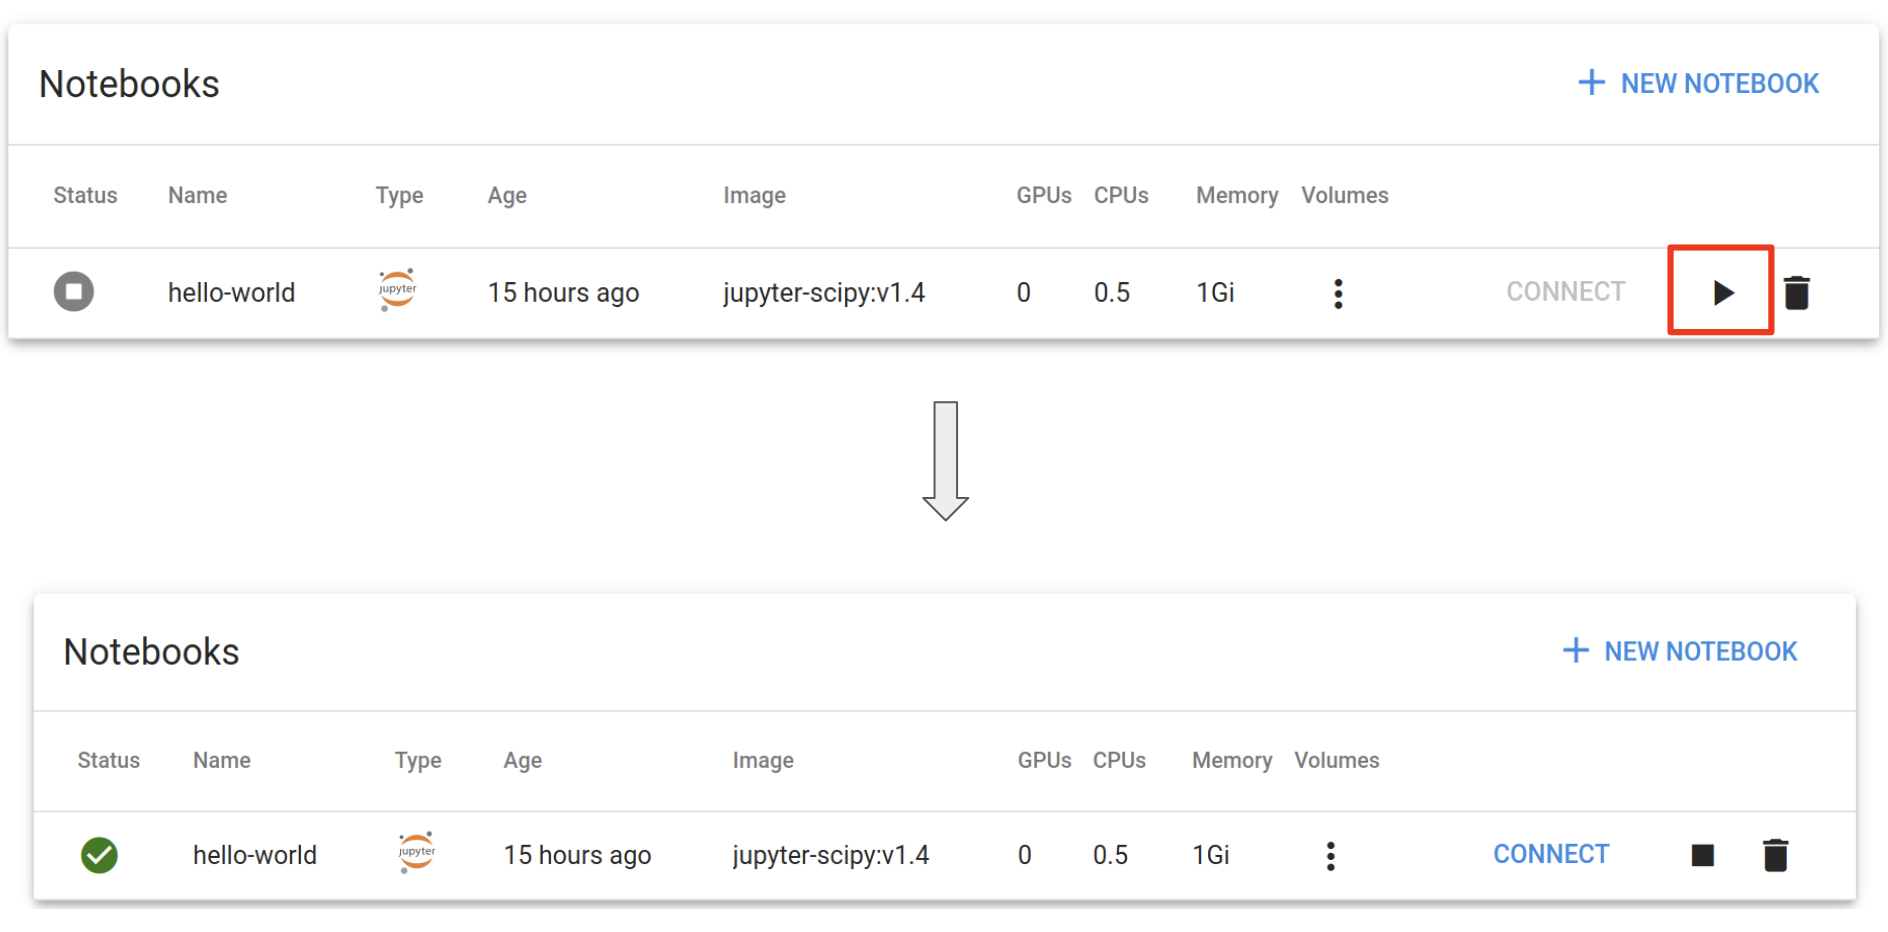
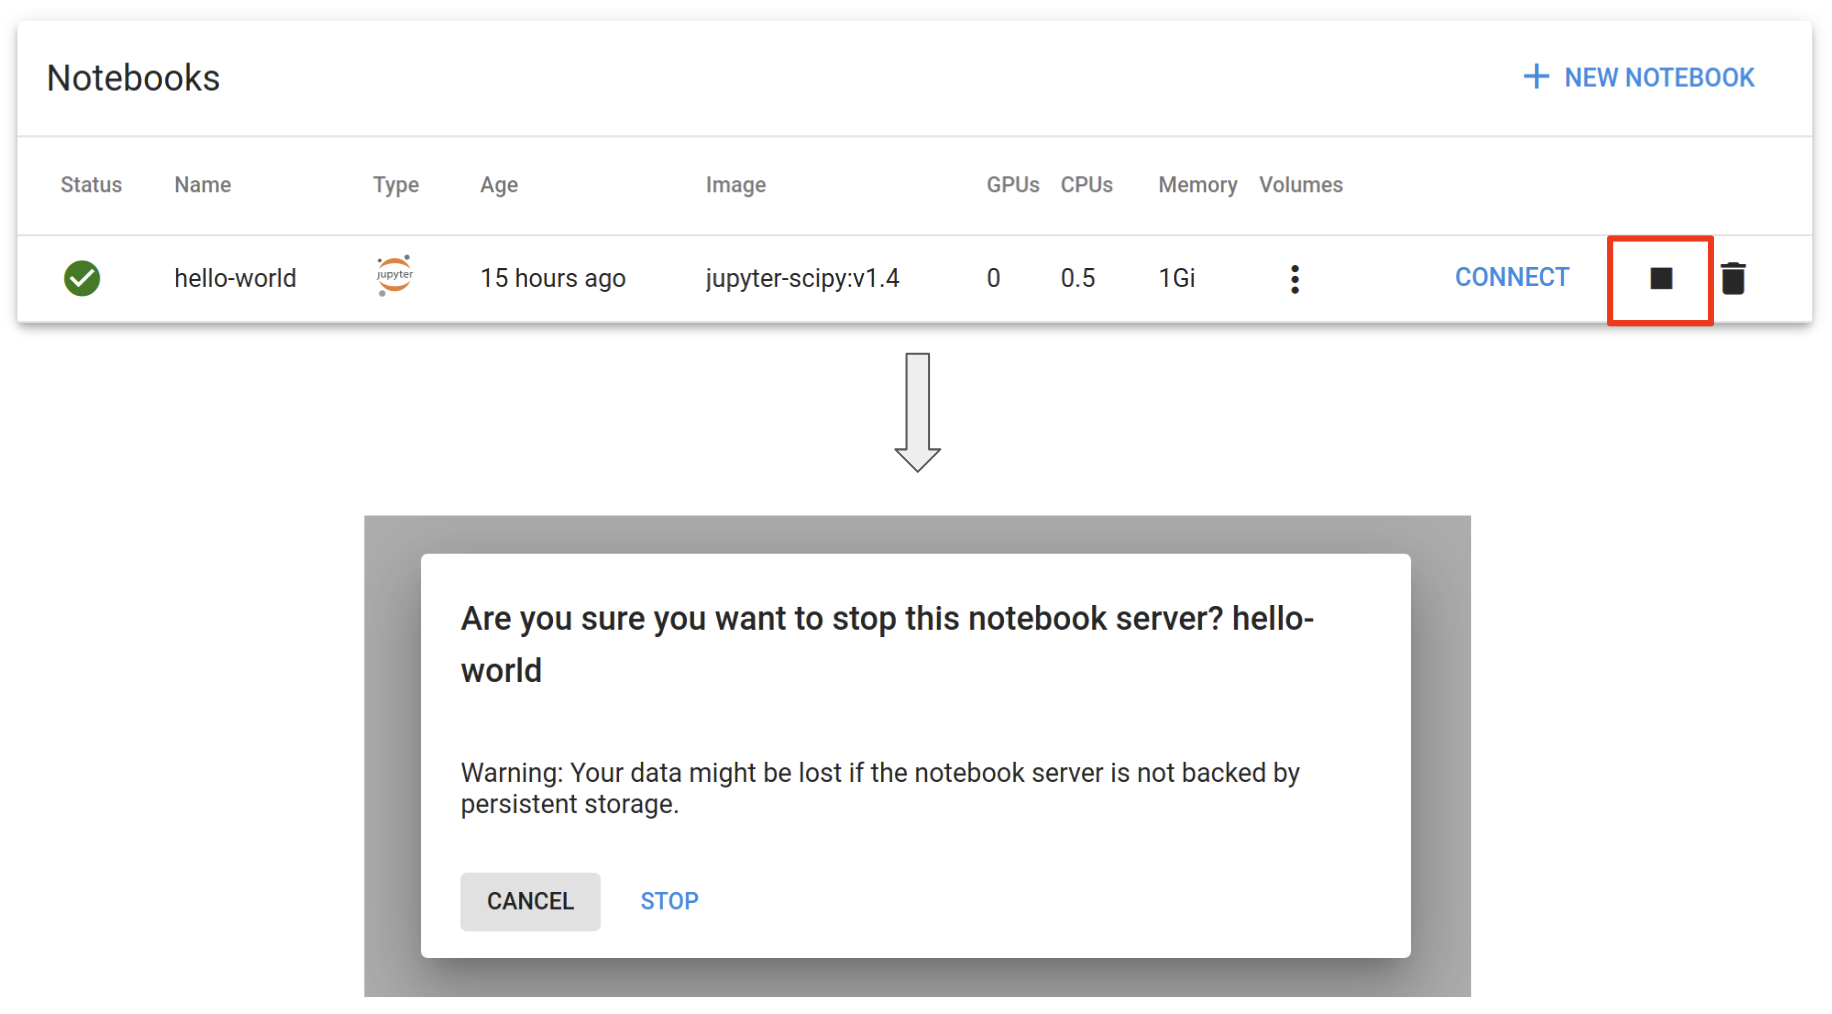
Stopping the Notebook Server
If you haven't used the notebook server for an extended period of time, you can stop it to optimize resource usage in the Kubernetes cluster. Note that stopping the notebook server will result in the deletion of all data stored outside the Workspace Volume or Data Volume specified when creating the notebook server.
If you haven't changed the path during notebook server creation, the default Workspace Volume path is /home/jovyan inside the notebook server, so any data stored outside the /home/jovyan directory will be deleted.
Clicking the STOP button as shown below will stop the notebook server:
Once the server is stopped, the CONNECT button will be disabled. To restart the notebook server and use it again, click the PLAY button.